Goodbye 2013. Hello 2014.


image source
Like many bloggers I am jumping on the band wagon of reviewing this year which is hours from being over and looking ahead to the new year to come.

Back in January I wrote about my aims for 2013 and what I hoped to achieve. You can read all about them here but I can say now, I have not been able to meet my aims. Has it been that I set the bar too high? Possibly. Has it been that I have been sidelined by other activities. Possibly. Or has it just been that life got in the way? Probably. I cant help but say I do feel disappointed to have "failed" in meeting my aims, I have not achieved the number of sales I had hoped for in my dedicated website, but, I have set up an Etsy shop this Christmas and received lovely sales there and I have plenty of plans for this coming year. I have not completed my thirty before thirty challenge (a case in point at setting the bar too high?) but I have bought a gorgeous bike, Betty, and am slowly exploring Cambridge, and I have been successful in mostly giving handmade gifts throughout the year, something I intend to do in 2014 too.

Despite feeling sad that I have not achieved my original aims I set out, I did find a new job in Cambridge which has improved the quality of my life by not having to commute for over three hours a day into London, I have been the President of the Puckeridge WI group in my old village, begun to make new friends at the WI groups I joined in Cambridge, had some lovely holidays (Scotland, France and Ireland) but more importantly, and something I may have hoped for but didnt expect it to happen, I got engaged.

Our Save the Date (I've removed the date for now)
And so 2014 is going to be a very exciting and crazy year. We are in the process of finding a new house to buy and move out of Cambridge a few miles and now we have our wedding to plan and I might blog a little about the handmade plans we have as the year progresses, only ten months to go! I think the main aim I have for the year to to keep all of the plates spinning and try and keep my anxiety under control. The past few weeks in particular have been awful in terms of anxiety and im not ashamed to admit there is a dark cloud hanging over me of late and it is not floating away but I am pleased to have the support I need from family to try and manage.

Image Source
So what for my list of aims for this coming year? Well, there isnt one. I have decided that moving house and getting married is enough for one year, I dont need to be sitting here in a years time comparing what I have or havent done. Instead however, I have decided to pick seven words and to try and incorporate them into my daily life as "aims". The words are:

1. Fun / Laughter - it is so important to laugh every day and have fun.
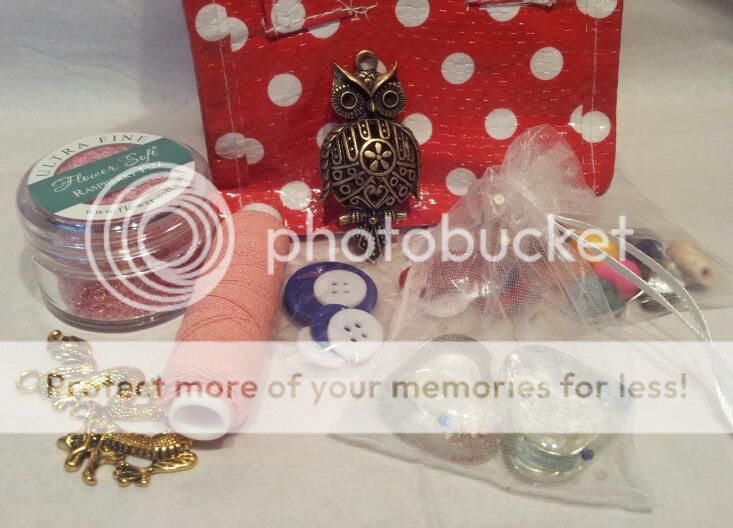
2. Make / Handmade - I want to be more creative and will continue to give handmade gifts
3. Save - With a house and a wedding this one is obvious!
4. Finish / Declutter - I have *so* many toiletries, stationery etc, I want to use them up before buying more which will in turn reduce the amount of clutter.
5. Blog - The only business aim I am setting this year is to blog more and I have plans!
6. Care / Relax - As mentioned my anxiety is taking control of me and I need to work on caring for myself and relaxing to get through the year,
7. Time Management - my overall word for the year, I need to manage my time well between my job, running Butterfly Crafts, wedding planning, house decorating and just life!

Have you been pleased with what you achieved in 2013? What are you looking forward to about this coming year?

Tuesday 31 December 2013 | 0 Comments

Wishing you a Merry Christmas

I wanted to take this opportunity to wish all of my lovely customers, supporters and readers a very Happy Christmas and holiday season. I have appreciated all of your support over this past year and I am so excited as to what adventures 2014 will bring in terms of my wedding, moving house and plans I have for Butterfly Crafts and I look forward to sharing them with you all.

Image source


Tuesday 24 December 2013 | 0 Comments

Beautiful Handmade Christmas Decorations Available Now

If you're like me and you love a Christmas tree that really sparkles when the lights are all turned on and it's dark outside then consider treating yourself to beautiful handmade Christmas decorations from Butterfly Crafts. 

Handmade Blue Bauble Christmas DecorationHandmade Gold Star Christmas Tree Decoration

These handmade Christmas Decorations not only look fantastic on the tree but would work really well tied into a handmade garland. But they are also perfect to buy for friends as an extra special stocking gift and work really well if you make your own crackers for the table at Christmas lunch and want to include something beyond the mini pack of cards or plastic ring!

Purple and Gold Handmade Christmas DecorationRed and Black Boot Handmade Christmas Decoration

 I have a range of decorations available including Boots, Baubles, Stars, Bells, Presents and the extremely popular Christmas Pudding - I could not get enough of these made last year and so have started early this year! I also have a range of colours available including the traditional reds, greens, golds, silvers and whites to the more contemporary blue, black, purple, pink and brown depending on the colour scheme you have on your tree.

handmade Christmas Pudding Tree DecorationHandmade Burgundy Bell Christmas Tree Decoration

 As I know that Christmas can be an expensive time of year, why not spread the cost a little of having beautiful handmade decorations with my pre-payment plan. You can order whichever shapes you would like and in the colours of your choice, pay a non-refundable deposit of £2 per item and then pay the balance (with postage) when they have been made for you. Find out more about my Christmas Decoration pre-payment plan here.

Thursday 10 October 2013 | 0 Comments

Big Stamp and Scrapbooking Show

A couple of weeks ago I ventured into the outskirts of London to visit the Big Stamp and Scrapbooking Show at Alexandra Palace. I have been to the show before, in April, and was in two minds whether to go in September because of a lot of things going on and already having enough craft supplies! But, as we needed to go to Ikea which is nearby, it made sense to combine the two, and so off I went for a few hours whilst Paul explored the coffee shops of Muswell Hill.

When I arrived I decided that the best strategy was to have a walk around first and just try and take everything in, and then have my lunch before shopping some more. The good thing about this show is the grid-like layout and with plenty of space between stalls - unlike the Stitch and Creative Craft Shows I have been to in the past. It is easy to navigate and there is also a vast amount of chairs and tables to sit and contemplate your spending or to eat a sandwich.

Big Stamp and Scrapbooking Show
 What I like about this show is that there are so many demonstrations on the stands, and it attracts the "celebrity" crafters who demonstrate for the various companies - Sue Wilson, Leonie Pujol and Ali Reeve to name just a few.

I also love to see the new products and gain inspiration for ideas as I do love to stamp and wish I did more of it. One of the best things is being able to take photographs of the card samples when you buy products at stands.

This time around I purchased a multitude of supplies from "Every Craft's a Pound", brushes and stamps from Inkylicious, Stamps from Stamposaurus and other bits and pieces during the day. Now all I need is to get crafting!

Craft Supplies
Supplies purchased at the Big Stamp and Scrapbook Show

Friday 4 October 2013 | 0 Comments

Exciting News and My Big Craft Challenge

Things have become even more interesting in my life lately, there I was getting ready to start full time in my job and have all these Christmas craft fairs planned, starting to look to buy a house and now...


That's right! I now have a fiancee and am planning a wedding for Autumn 2014. People have been asking me what sort of wedding we will have and will it be crafty, the answer is yes, there will be a lot of craft elements but that is because its who I am. I could never justify buying invites and such like when I am able to make my own.

I do want to keep a lot of my wedding a surprise for our families and guests but I will share little snippets when its right to do so but I also don't want to bore everyone. But for now, let me introduce the man who asked me to marry him

Thursday 3 October 2013 | 1 Comment

Banana & Choc Chip Muesli Bars - Make Your Own

Make your own banana and chocolate chip muesli bars
I have to admit I do like to snack and chocolate is my weakness, if you are like me and are looking for healthy snacks but to help with the chocolate craving give these easy to make Banana and Chocolate Chip Muesli Cereal Bars a go. These bars are also a way to use up bananas you might have thrown away because their skins went a little brown or they got a bit bruised.

To make your muesli bars you will need:

* Three bananas
* 2 cups of rolled oats
* One cup of apple juice
* One cup of raisins or sultanas
* 1/2 cup dark chocolate chips
* 3 tablsepoons of sunflower seeds

And this is how you make your yummy snack:

*Mash two bananas in a bowl with a fork then add another banana which has been chopped into small pieces,

*Add to the bowl two cups of rolled oats, one cup of apple juice and one cup of raisins (or sultanas if you prefer)

*Mix the ingredients together well and then add the 1/2 cup of dark chocolate chips and the 3 tablespoons of sunflower seeds.

*Line a baking in with baking parchment and spread the mixture to about 2cm thick.

*Baked in the oven for 15-20 mins on 180C/Gas4

*Once cooled, remove from the tin and cut into the desired size bar and store in an air tight container. I usually cut them into 2" squares.

When I have made these cereal bars I find they need to be eaten within a week because of the banana in the mixture. If you had school children these would be a great snack to whip up ready for their lunch boxes the following day.


Friday 27 September 2013 | 0 Comments

Learning Lino Printing

Lino print tea towelI have wanted to try out a few new crafts recently just to see if anything else takes my fancy and one of those was Lino Printing so when I saw local craft workshop Betty Makes, from Newmarket, was running an evening workshop I jumped at the chance to book. Being a bit of a nervous type I didn't fancy going alone and so Holly from Ilex Made This came along with me.

Lino printing is a print making  technique in which a sheet of linoleum (sometimes mounted on a wooden block) is used for the relief surface. A design is cut into the linoleum surface with a sharp knife or V-shaped chisel with the raised (un-carved) areas representing a reversal (mirror image) of the parts to show printed. The linoleum sheet is inked with a brayer and then impressed onto paper or fabric.

Betty Makes is a lovely little studio room run by Jean-Mary and it is such a pretty place to be with craft materials displayed and a big table for the students to sit around. Classes fit up to eight but at this workshop is was just Holly and myself which meant we had lots of space to get messy!

Lino print card workshop at Betty MakesJean-Mary started off by talking us through what we would be doing - drawing out a design on to paper, transferring it to the lino and using tools to cut it out, and then printing on to our blank tea towel. As it was just Holly and I we also had time to print a couple of cards and Jean-Mary explained the different paints to use on paper rather than fabric.

Now, I am the first to admit that I am AWFUL at drawing, I even struggle with stick men, and so I may have cheated slightly and took along some of my paper-crafting stamps for inspiration. Once I decided upon the butterfly I traced the design on the stamp packaging and used that, but I don't mind, I think it came out great!


I am pleased with the design around the tea towel and may use this as part of a Christmas hamper as a gift at Christmas. I also made two cards and prefer this one with two butterflies in the corners rather than the one big butterfly which is on the other card.


Holly did great drawing her baking utensils from scratch and I love the design she made in bright colours.

We both really enjoyed the workshop and I think we may both have a go at this technique again, but if not, I can still see me returning to Betty Makes to attend more workshops!

If you would like to have a go at Lino Printing why not take a look at the Betty Makes schedule?

(This is not a paid post, I just love what Jean-Mary is setting up with craft workshops)

Monday 23 September 2013 | 0 Comments

Vanilla Essence - DIY Tutorial to make your own

Make your own vanilla essence tutorial
If you're a keen baker I would guess you have a bottle of vanilla essence in your cupboard, but have you ever thought how easy it is to make your own Vanilla essence?

I hadn't, but last Christmas I was on a mission to make as many of my Christmas gifts as possible, because I love handmade and crafting but also because I think something handmade has more of a personal value and no time is this more prevalent than Christmas

I decided to make up some hampers for family and combine lots of handmade goodies and one of the elements I made was handmade vanilla essence. It was so easy to DIY that I also made up a sneaky batch for myself and I have been using it throughout the year in my cake baking as its much nicer than those tiny shop bought bottles and lasts longer.

If you think this might be something you would like to make as Christmas gifts I would suggest making it soon as it needs to steep for at least six weeks to get a strong vanilla flavour.

To make your own Vanilla Essence you will need:
10-12 vanilla pods per bottle - I bought mine here
250ml Glass bottles - I bought Kilner ones here
Vodka
Knife

How to make your own vanilla essence
DIY vanilla essence
The first thing to do is sterilise the bottles - I did this in the dishwasher with no detergent and then leave the bottles to air dry overnight.

The next stage can get a bit messy! You need to run the knife along the length of the vanilla pod and scrape out the seeds, leave them on the pod but not trapped in side. As you scrape each pod put it in the glass bottle, its okay if the seeds fall off in the bottle.

Repeat this for all of the pods, I managed to get 11 in each bottle.

Fill with vodka, seal the lid and give it a really good shake.

Store in a cool dark place for at least six weeks or longer but each week give the bottles a gentle shake to mix up the essence. Eventually the vodka will turn a gorgeous shade of brown and smell delicious!


Friday 20 September 2013 | 0 Comments

Distress Ink Colour Chart - How To

Like many crafters I love my Tim Holtz Distress Inks for papercrafting and I have collected quite a few from the various ranges.

I love Distress Inks because they are great for stamping but also painting with if you use a water brush.

The problem however with the inks is that you cannot get a true colour representation from the lid of the ink pad. To rectify this, I decided to make a colour swatch which I will keep with my inks and can reference when stamping but something that I could also add to as I purchase more inks - which I most definitely will! The colours all together just look so pretty!

To make a colour swatch like this one you will need:

1. First of all punch out the shape of your choice in the white stamping card for how ever many inks you have.
2. Using the blending sheet and the blending tool ink the card shapes making it darker around the edges and gradually lighter in the centre so that you can see the range of colour shades you can create with one ink pad. 
3. Using the rubber stamp, stamp the image in the centre of each colour swatch so that you can see what a stamp in each colour will look like.
4. Write the name of the ink colour along the edge of the card shape.
5. Repeat steps 2, 3 and 4 for each ink that you own.
6. Punch a hole in the corner of each shape.
7. Arrange the colours into groups - eg all the blues, greens etc and then tie a ribbon through to create a loop. Alternatively you could add the cards to a metal ring but I think a pretty purple ribbon is the best option!

I hope this will be a helpful addition to your craft organisation techniques and save you a little time with knowing exactly what the colours will look like!

Sunday 15 September 2013 | 0 Comments

Autumn Card Challenge

I think it is a sad but true fact that Autumn is on its way with the chilly and wet weather we have been experiencing in Cambridge this past week, I am thankful for my heater next to my desk at work! Although I dont like the cold weather, I do love the colours that come with Autumn and the beautiful oranges and reds on the trees when the leaves turn.

With this in mind I was really pleased to see that fantastic card stockist Papermill Direct have created an Autumn themed challenge with the winner becoming part of their design team. You can read more about the challenge over on their blog.

For the challenge we have to create something that represents Autumn and I came up with this card (and then whilst in a card making moment I made the second card too!).


The card is A5 in size with a cream base and I firstly made mask cutouts of the leaf stamps and inked through the cut outs on to smaller squares of card edging with distress ink, and then stamped the leaves  with brown embossing powder to give an overlapped appearance and showing the veins of the leaves. The panel of text started as plain brown card which I then stamped with the Autumn themed text stamp in an embossing powder with a sheen so it shows up and shines. Finishing with a tied ribbon.


Whilst my mind was thinking of Autumn themed cards I also came up with this card using a brayering technique and embossed backing card which I think is really pretty.


 Wish me luck in the challenge!!!


Friday 13 September 2013 | 0 Comments

Getting Ready to Enjoy Cambridge

About a month ago I wrote a blog on me looking forward to an Exciting Summer in Cambridge and now that I have two days off a week I am getting even more excited and am starting to compile a list of things I would really like to do to make the most of living in this amazing city. Some are personal to me like being able to cycle into town on my own whilst others are more social and touristy.

I go for a walk most days on my lunch break from work and often find myself at the Market which runs every day. There are a couple of great fruit and veg stalls and I have also discovered a fabric stall, I love being able to see so many independent businesses.

Cambridge Market Square

It was my birthday last week and my parents, Paul and I took a punting tour of the College backs. This is something Paul has done a few times but it was new to my parents and I. It was a really relaxing afternoon despite the River congestion and Summer School punters but I learned a few things about the history of some of the Colleges.

Punting on the Cam
Punting on the Cam

I have begun a list of other things I would like to do and places to visit in Cambridge but please leave me a comment if you think there is something that is "really Cambridge" I have missed off

Visit the Folk Museum
Have a cake in FitzBillies
Go to a gig at Hot Numbers
Walk up the Gog
Cycle along the River Cam and have a picnic
Kettle's Yard (I walk past every day)
 Botanic Gardens
Whipple Museum of Science
Visit the Polar Museum
Take an evening wildlife punt tour
Have a meal at Cau
Sit in King's College Chapel
Go to IWM Duxford
Spend an afternoon at the American Cemetery at Maddingley
Visit a lot of the College Gardens
Milton Country Park
Wandlebury Country Park
Swim at Jesus Green Lido
Denny Abbey & Farmland Museum

I am hoping now I have more time in the week and at weekends that Betty the Bike and I will get more confident on the roads and get out and about into Cambridge. We made it to Hobbycraft at the weekend!

Cycling to Hobbycraft
Betty and I at Hobbycraft

I have signed up to Instagram and hope to utilise it more for sharing pictures, this is my Instagram profile if you want to follow me

Friday 9 August 2013 | 3 Comments

DIY Bird Seed Cookies

DIY Bird Seed Cookies from Butterfly Crafts
I have been doing quite a bit of gardening lately to make our decking area look good for our Summer Party and I am definitely gaining a fondness for gardening and pretty plants. When we move, I look forward to having a garden that attracts wildlife - bees, butterflies and birds - and to help with this in the space we currently have, I have been making up some bird seed cookies.

These really dont take long to make at all and are a great activity to do with children if you are about to start your long summer holidays from school. They can take a few hours to harden so best to start early in the day or if you make them in the afternoon, leave them to set overnight before hanging up.

You will need:
3/4 cup of plain flour
1/2 cup warm water
1 packet of unflavoured gelatin
3 tablespoons of golden syrup or corn syrup
4 cups of bird seed
Vegetable Oil
Baking parchment
Wooden Spoon
Ribbon or String
Drinking straw
Cookie cutter

DIY Bird Seed Cookies MixtureIn a bowl mix the gelatin with warm water and set aside. In another bowl, mix the flour, bird seed and the syrup. It will end up quite a tough mixture to stir. Pour over the water/gelatin mixture and give another stir.

Line a baking try with baking parchment and lightly oil with the vegetable oil, also rub some oil around the cookie cutter which will help release the bird seed cookies.


Pack the cookie cutter tightly witht he seed mixture, use a tea spoon to press it firmly if needed. Use a drinking straw to make a hole the seed cookie and leave this there whilst the cookis set - you might find it more economical to cut a straw into about four parts.

Carefully remove the seed cookies from the cookie cutter and set aside to dry for a few hours, overnight would be best. Once dry, tie some ribbon or twine through the hole and then you are ready to hang the seed cookies up in the garden.

Why not have a go? These are great for sensory explortion for little hands and also fun for children to keep an eye of out different birds that might come into your garden or any outside space that you have. I would love to see what shapes you make with your cookie cutters.


Monday 22 July 2013 | 0 Comments

An Exciting Summer

To me this image sums up the vision of Cambridge - a sunny day punting on the River Cam. This bridge is very close to where I work and I stroll across it most days and see what is happening down on the River. Now that Summer is here the River is getting busier and busier filled with punts of tourists or students taking trips around The Backs, it always looks so relaxing and a good way to see some of the City.

I am looking forward to a very exciting Summer. I currently work part time but have a separate position for the other two days a week but I am very fortunate that in a few weeks time I will be able to drop the additional two days a week until January. I am so excited to have this opportunity and I cannot wait to explore more of Cambridge and the city I now live in with Betty the Bike. I have started a list of things I want to do, simple things such as take a walk along the river, visit some museums and explore which tea shops have good cake!

But I am also really excited that I can use this time to work on Butterfly-Crafts.com and get prepared for Christmas and all of the Christmas craft fairs I do during that time of year. I have plans to build a new craft desk in my work space and have a permanent place to be crafting and get the creativity back!

What are you looking forward to doing over the summer? Have you any crafty plans? Anything that you can recommend for me to add to my "Must Do" in Cambridge list?


Wednesday 10 July 2013 | 2 Comments

Nana May

My Nana would have been the amazing age of 100 today had she still been alive, she always did want to live until she was 100 and get her letter from the Queen. But, sadly she passed away almost twelve years ago now, shortly followed by my Grandad.

This photo was taken when they were both still in good health on one of their wedding anniversaries, I cant remember for certain but I think it was either their 50th or 55th, I remember shortly after this photo was taken my brother gave them green edible underwear. They thought it was hilarious, Mum, not so much!

My Nana taught me how to knit when I was little, she patiently helped me make a pink tea cosy for my little china tea pot, I still have it somewhere packed away in a memory box. She was a wonderful knitter. I am a child of the '80s and was gifted with many knitted jumpers, one with Thomas the Tank Engine on it, and many more, usually every Christmas. She would also knit for my Grandad the most wonderful Cable or Aran knitted jumpers, Mum still has a few that she cant bear to part with so I suggested with turn them into cushion covers at some point.

Sadly I forgot how to knit very quickly, I found cross stitch instead and that was easier for me. But it did not stop me looking through all of the wool and helping her wind the yarn. When I was doing my MA I decided that I wanted to take up knitting again but unfortunately, about 6 months before, Mum had given away my Nana's knitting needles, she, nor I, never expected me to want to learn again. But even though I dont have her needles I still think of her as I knit, I can picture her in her arm chair with the big ball of wool beside her clacking away at something or other.

Something we do have is her beautiful treadle sewing machine, neither Mum nor I have braved using it yet, it sits in my parents bedroom under the pile of ironing as it is in a cabinet, one day though I am sure we will give it a spin. We also have the "Button Tin". There are hundreds of them!

My Grandad was a keen gardener, he loved to potter about in his greenhouse in his green coat and flat cap and I am now just starting to get an interest in gardening and I often think of him. I am glad that I can feel both of their influence on me and my skills, I may not be able to knit Thomas the Tank Engine, but I can feel Nana's hands over mine on my little plastic yellow knitting needles guiding me on my stitches and for that, I am thankful.

Happy Birthday Nana, enjoy your Birthday dance with Grandad, wherever you both are.

xxx


Tuesday 2 July 2013 | 0 Comments

A Tense Kind of Day

I frequently get headaches, I get all sorts - tension, cluster and migraine, most of the time I can pop a few pills and sleep it off and its all fine, but not at the moment. I started my latest tension headache about a week ago and it has built and built and built to the point a few times a day I feel like someone is pounding the back of my head with a wooden bat. 

Today was a scary day, I took a sick day as I've just not been right and I thought after a week it was about time to go to the doctor and get this checked out. Now, quite a few people would just pop some migraine tablets and wait for it to subside but with my blood issues I cant just do that and its at times like this my blood issues drive me potty. Anyhoo, my GP was fantastic and took me seriously and promptly referred my to the hospital. She was 99% certain it was 'just' a tension headache but with my history, there is that small chance there could be a clot in my brain or a brain haemorrhage so off to Addenbrookes I went.

I have to say, I am so impressed with the medical staff I have had dealings with since I moved, the Thrombosis Clinic at Addenbrookes are fantastic, I was treat like I mattered and wasnt just wasting their time over a 'headache'. I was a bit nervous about the CT scan but so relieved they didnt need to do a Lumbar Puncture as that would have involved being admitted, my blood meds reversed, do the Puncture and then get my meds back to normal - before going to France on Thursday. When everything came back clear I was relieved.

But, I was also cross with myself. Why does stress, anxiety and tension affect people in different ways? How do some have the coping mechanisms that these things dont seem to concern them? And for me, why do I get shoulders like concrete when I'm stressed, feel like I'm losing grip on situations and suffer these intense tension headaches?

Today was a bit of an eye opener for me and I am beyond thankful that there is nothing lurking in my head. However it is also a big lesson learned that I need to manage my anxiety and my coping mechanisms for stress and feeling run ragged. I am off on holiday in a couple of days, ten days of enforced relaxation and not doing much beyond walking along the beach, sitting by the pool, relaxing on our Lodge decking and eating French food - sounds exactly like what the doctor ordered and time for me to take stock as to what is really important and what I can cope with on a manageable level.

So please do enlighten me - how do you deal with stress and anxiety?

Monday 17 June 2013 | 1 Comment

Handy Hippo and Me

I love buying craft supplies, what crafter doesn't!?! I try to shop around for the best deals and great products that I know will last, so when Handy Hippo put out a design call for people to write tutorials and blogs for them I jumped at the chance and was accepted.
What this means is every so often I get to write a blog or two about crafting, tutorials, papercrafting etc just like any normal tutorial, but you will be able to buy the items used at Handy Hippo if you want to. I also get to have my tutorials featured on their website which will hopefully bring me some new blog readers and reach a new audience!

Friday 31 May 2013 | 0 Comments

Cambridge Blog Meet Up

Almost three months ago, a group of women were to be found in TaBouche in Cambridge having lunch and a good old natter about crafting, blogging and life in general. Organised by the truly fabulous Claireabellemakes it was an opportunity for us blogging types to get together and meet in a more civilised manner than through our computer screens.

The Goodie Bags (Picture from Claireabellemakes.com)
 As per usual I was really nervous beforehand as in March I was still really new to Cambridge and meeting new people is daunting but luckily for me, some of the people I was chatting with I knew through the CamCity WI. But I needn't have worried really, everyone was talking about all and everything and nothing in particular, but the biggest talking point were the fabulous goodie bags arranged by Claire and contributions from a few other attendees. I really hope there will be another meet up soon!

Lush Soap, Washi Tape, Ring from Claireabellemakes
  
Fab gifts from the Illustrators who were at the meet up
Crafty bits from monthly subscription craft box Crafty Creatives

The goodie bags were amazing and included more crafty things too, people were very generous to donate to our day and we would all like to thank Crafty Creatives , Homemaker Magazine, WashiTapes.co.uk, Printed.com, Graze, Tea Pigs, Dex Diva, The Sheep Shop, Stacie Swift Illustration, Ohnorachio, Harriet Gray, Lush Cambridge and Ta Bouche bar.


Tuesday 21 May 2013 | 0 Comments

Words of Wisdom from Walt

Some days you just need a little inspiration, today is one of those days and so I wanted to share this image I found with words of wisdom from Walt Disney.


When you need some inspiration, what words of wisdom do you turn to?

Saturday 18 May 2013 | 0 Comments

Life Is Like Riding a Bike

I have a new bike, she is called Betty and soon I shall give Betty her own blog post where you can meet her all and see her in all her 'L' plate glory! But for now I wanted to share a bicycle picture I have found and am hoping that we can have something like it in our spare room at home.

I have wanted an inspirational image in the room as we use it as a craft room and also office space, along with where we stick guests when they need a place to sleep. Sadly I fell in love with a Dr Seuss poster but we can not find it in high enough resolution to print, but this one is so pretty!

What do you think? Would it look good in the spare room?


Tuesday 14 May 2013 | 0 Comments

Stamp Storage!

Like many papercrafters I have a lot of rubber stamps - well, stamping and colouring is one of my favourite papercrafting techniques. Not only do I love to buy new stamps but I am also a member of a monthly stamp club and so get a new set through my door every few months. This is wonderful but also means I have to think carefully about storage.

Today I decided that I needed to review my storage and so I got out all of my clear stamps out on to the dining room table (N.B. I also have a box of wooden mounted stamps, a huge box of rubber mounted stamps and then another box of misc. stamps).


I have four of these storage folders by Darice (above) which are actually designed for embossing folders but I like to use them for my stamps. I sorted through the stamps into categories to make storing them easier, for example I have "men", "female", "flowers", "sewing", "gardening" and such like. It took a little while to get them all organised but when I did, I added tags to the folders so when they fit in my stamp cupboard I can easily get out the folder I need to use.

Now all I need to do is organise my other stamps now!

Tuesday 7 May 2013 | 0 Comments

And the Giveaway Winners Are.....

I have really enjoyed reading about why you support
and like handmade and handmade craft businesses 
like Butterfly Crafts! Supporting handmade means so much to me and helping the independent businesses is vital in this current economy.

I was pleased to have 15 entries to the Giveaway contest, names were put in my vintage tea pot and Paul picked out the two winners....

The winner of the first prize - two bars of natural soap, a scented sachet and a greetings card - is:

Annette  @Just_Net who said:

Handmade shows time and care. It's dedication. It's more personal. I prefer to support small businesses, especially those of my friends, than large anonymous businesses that only care about their profit and not their product or their employees.

The winner of the runners up prize of a soap sample pack is:

Lois @knittingsmybag who said:

I love thinking about the person making a craft that they love. Items with fragrances are even better because they are the gift that keeps on giving!

Thank you to everyone who has entered into the contest, I am sure that I will have another giveaway soon in the year so be sure to keep an eye out for it!

Friday 26 April 2013 | 0 Comments